Week 7: Creating an Animated Timeline for the History Page
- Julia

- Jun 23, 2019
- 2 min read
The animated timeline is used on the History page, in order to make the history of Enschede visually pleasing and livelier to the user compared to some static text. To achieve this result, I picked the animated timeline plugin for jQuery by Timelify.
The result is a timeline with different types of text boxes (left, right, centred) and points on the timeline. The original timeline had different colours and a bit of a different styling but I adjusted the style to our look & feel of myENSCHEDE. The result looks as follows:


When the user scrolls down on the website, the speech bubbles are not visible at first, but then they appear dynamically. The content in the speech bubbles is based on Nina's research about Enschede’s history. The pictures were not included in the timeline template and added by me separately after filling in the timeline.
The HTML code for the timeline looks relatively unspectacular, with most of the timeline functionality being added in the stylesheet. For this, I used a separate stylesheet because the styling of the timeline requires a lot of CSS code, and it helps us keep the work tidier.
This is an excerpt from the HTML code:

And these are some excerpts from the CSS code of my timeline stylesheet “timelify.css”:


The class “.timeline” is the container of the timeline, while the “.timeline hr” is the red line that you can see in the centre of the page. “.time-announce” is the class that contains the year (e.g. 1944). Similarly, “.content-announce” is the heading of the text box.
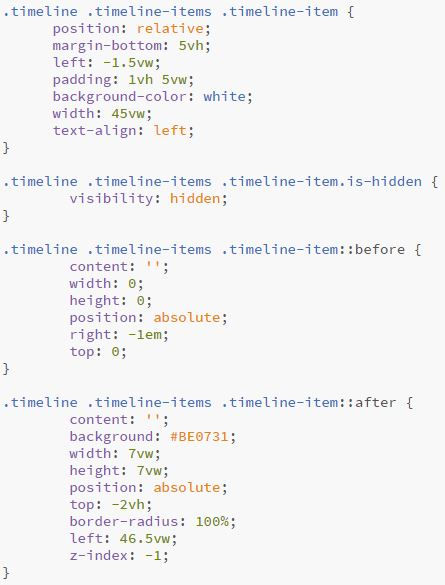
The single items with the class “.timeline-item” are the text boxes themselves. They are hidden at first. “before” hereby refers to the little arrow that points towards the central line. “after” is the small circle on which the little arrow lands.
After adjusting the elements to our needs (colours, measurements, removing unnecessary elements), the last step consisted of including the pictures. In the above HTML code, they are already included, but they still needed to be positioned in the correct way. With a few easy CSS tricks, this was possible:

The filler is placed on top of the image. It is an empty division that serves to align the upper edge of the image to the upper edge of the text box. An absolute position ensures that the image is on the same display level as the text boxes. For images on the right (where the text box is on the left), a margin is added to the left.


Comments